看着都是 ez 题emm
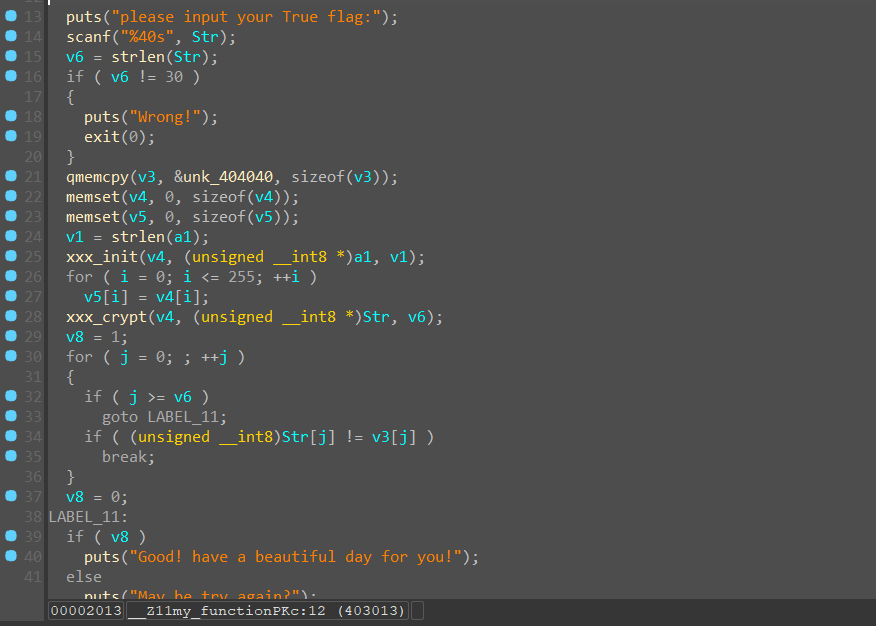
ezRe
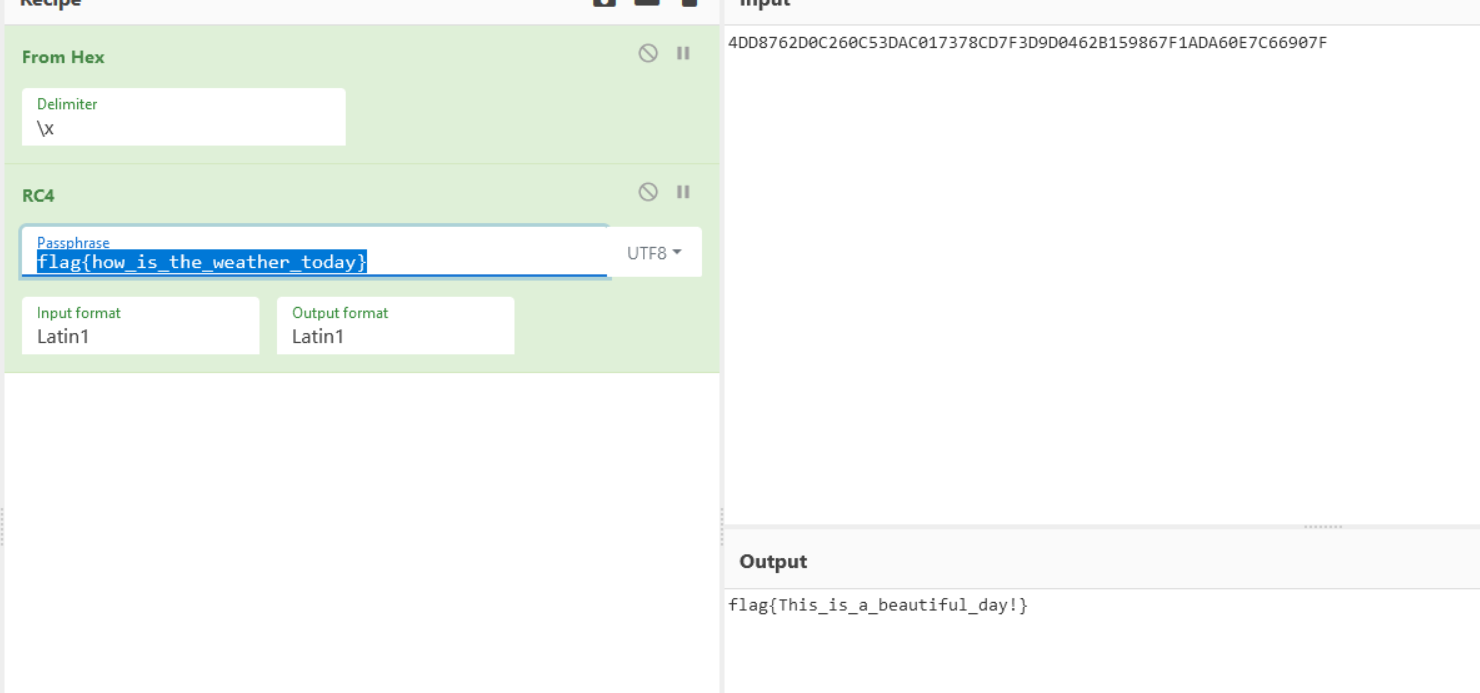
前面一个假的加密解出一个假的flag{how_is_the_weather_today},然后 SMC 进去解真flag,RC4,假flag是key
ezlogin
DES+base64,key从so里直接拿

easy_iot
binwalk 解包,然后进squashfs-root,用 stat filename 查看时间戳
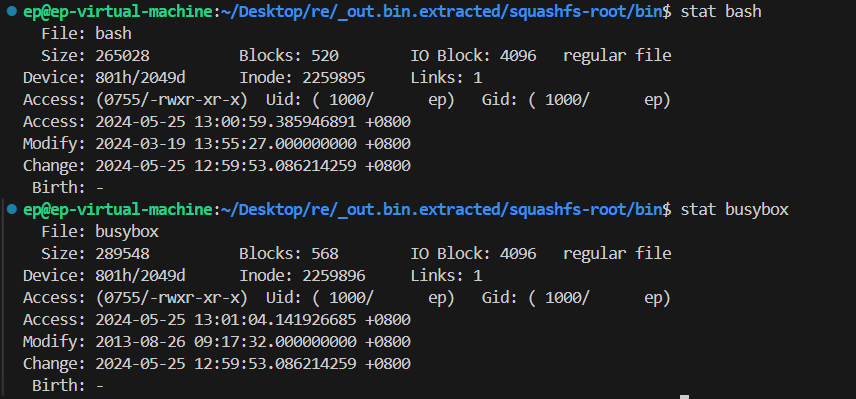
bash的 modify时间是 2024-3-19,看起来是动过的,upx -d一下解密即可
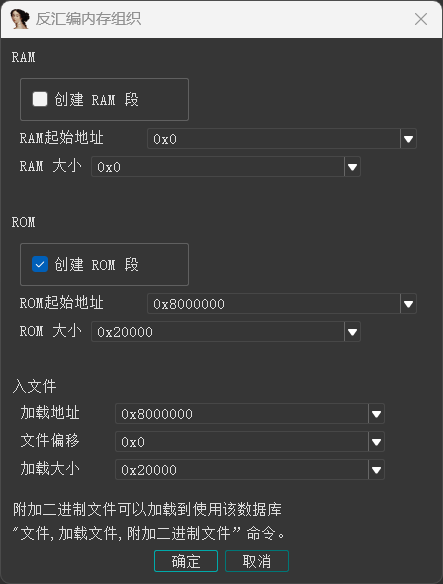
stm32
ida 8.3 能把函数修的很好,但是没有 decompiler,只能用 ida7.7 对着一点点修emmm
用 ida 打开,调下参数把 format 变成 arm-littie_endian : armv7-M,这个架构默认的入口地址是 0x8000000,根据这个创建ROM段,选择其基址为 0x8000000
看一下STM32的内存映射图
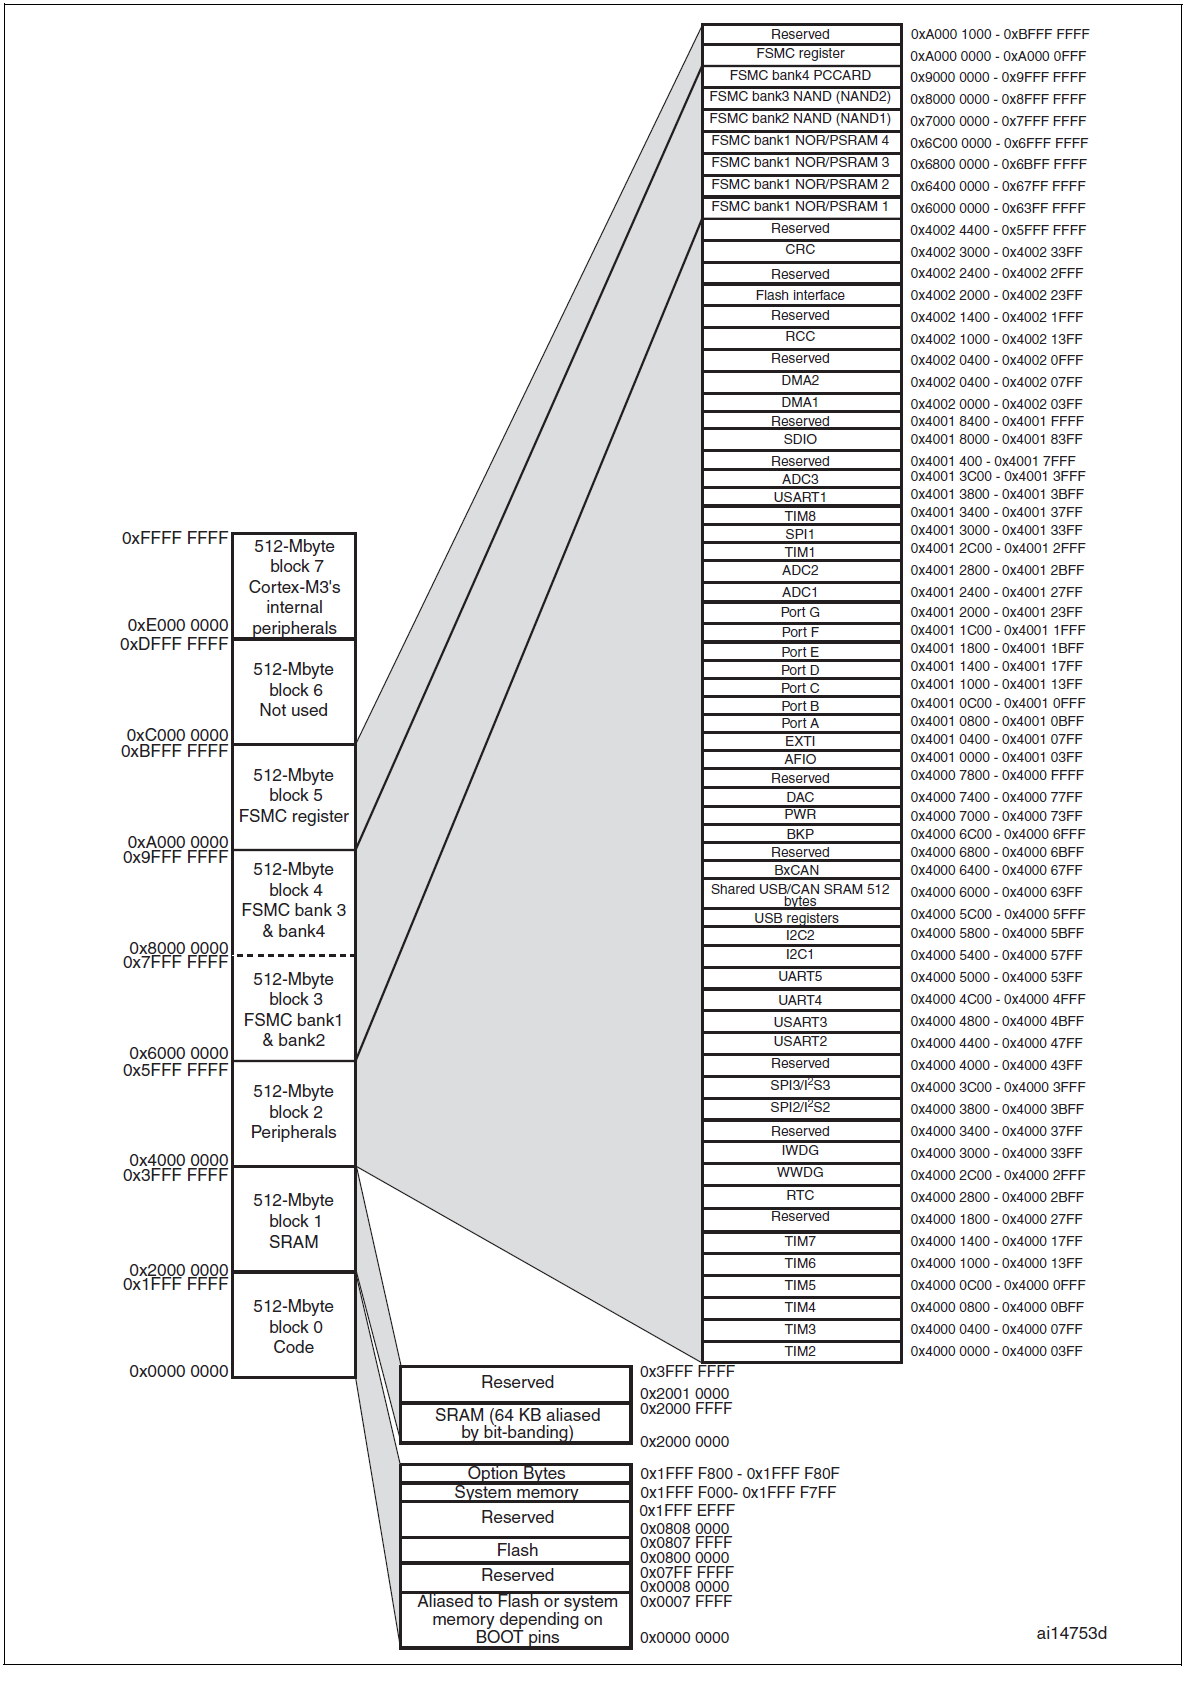
主要看的是 flash:0x08000000-0x0807FFFF, SRAM:0x20000000-0x3FFFFFFF, Peripherals:0x40000000-0x5FFFFFFF这三个段
flash 存储程序代码,SRAM 存放程序运算时的变量, Peripherals 是外设寄存器的映射地址,通过读写这些内存地址实现对外围设备的控制
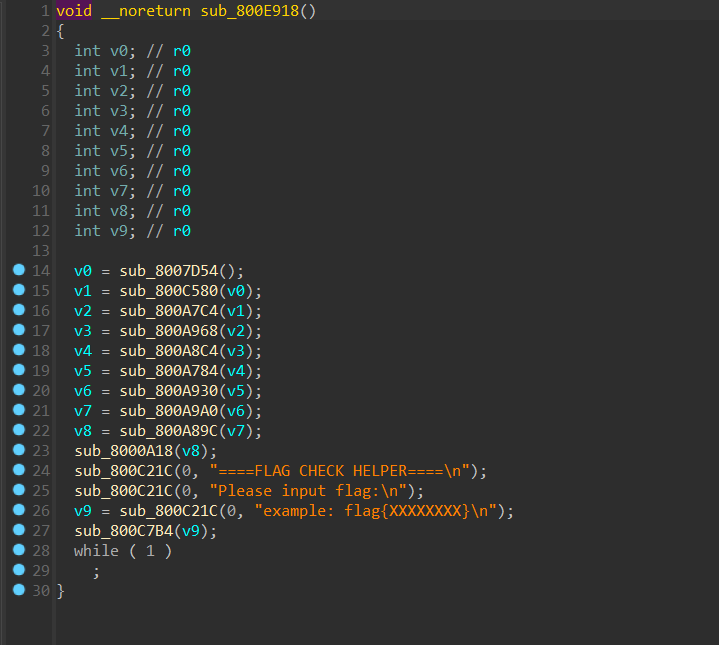
先看程序段,OFFSET 为 4 的地方就是程序的入口地址了,也就是其main函数

跟一下跳转可以来到这个函数
进到后面那个函数可以把 v1 修成一个地址
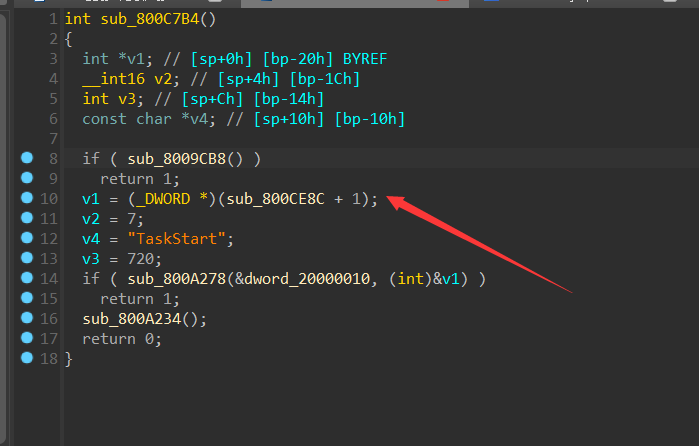
点进去发现是这个函数
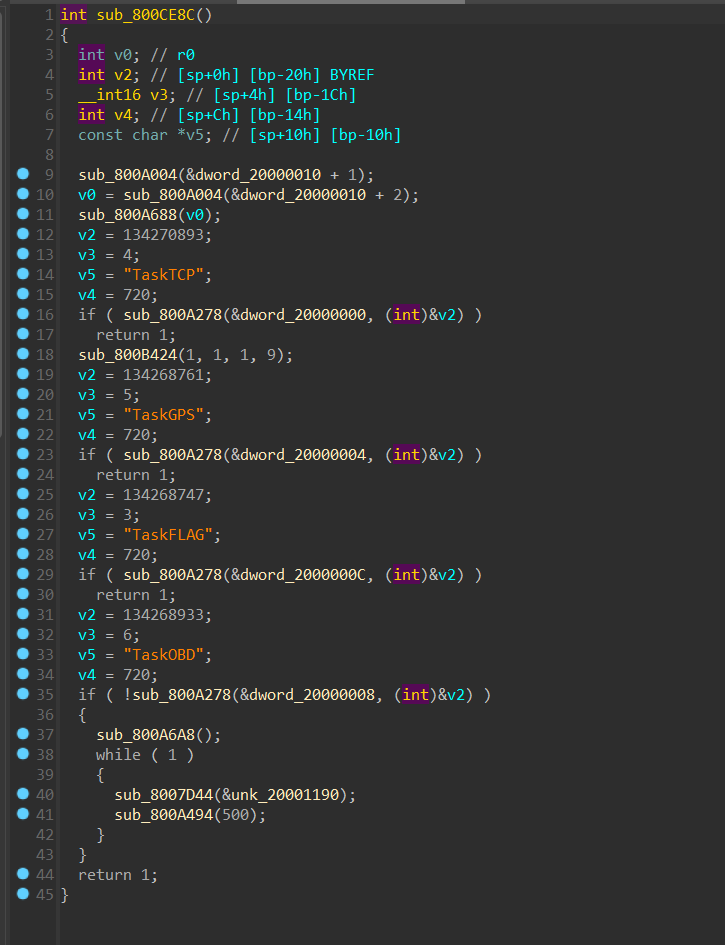
显然 v2 也对应着一个函数的地址,修好了以后我们进入对应 TASKFLAG 的地址
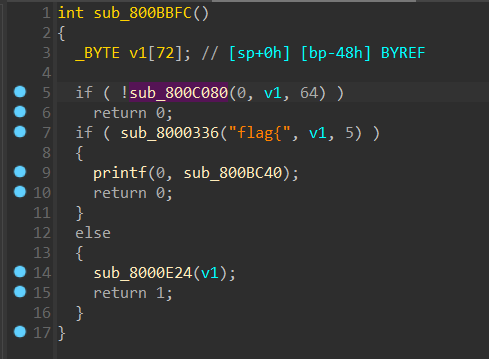
先检查了格式然后调用了下面这个函数
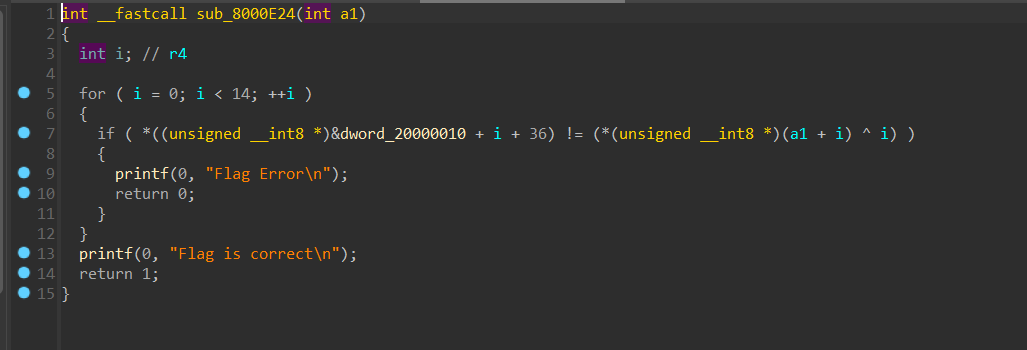
但是数据却怎么也找不到,这时候我们可以看到在执行 main 函数前(也就是 F4)进行了一段初始化


这个函数看起来贼抽象,应该是执行 sub_0x8009C0 这个函数,然后把前面三个作为参数填进去,得搞明白这个函数在干嘛
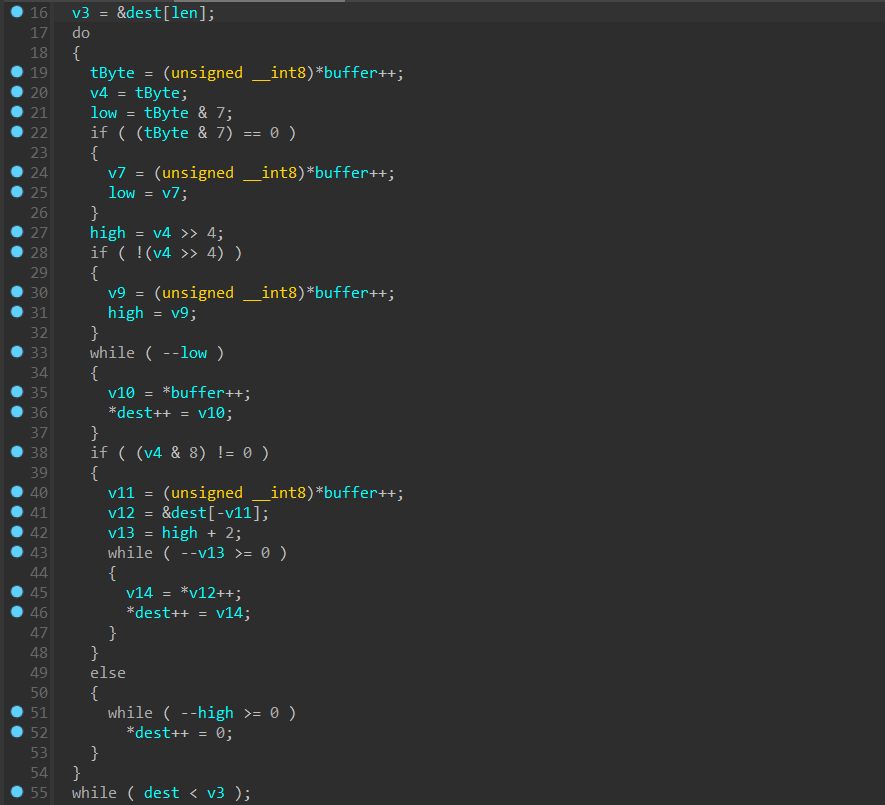
看起来是对数据做了一些解包之类的处理,其实可以不用管直接上 idapython
1
2
3
4
5
6
7
8
9
10
11
12
13
14
15
16
17
18
19
20
21
22
23
24
25
26
27
28
29
30
31
32
33
34
35
36
37
38
39
40
41
42
43
44
45
| import idaapi
data_addr = 0x8011F84
dest_addr = 0x20000000
len = 0x280
i = 0
j = 0
while i < len:
tByte = idaapi.get_byte(data_addr + i)
i += 1
low = tByte & 7
high = tByte >> 4
if low == 0:
low = idaapi.get_byte(data_addr + i)
i += 1
if high == 0:
high = idaapi.get_byte(data_addr + i)
i += 1
print(hex(tByte), hex(low), hex(high))
low -= 1
while low:
print(f"patch byte at {hex(dest_addr + j)} by {hex(data_addr + i)} : {hex(idaapi.get_byte(data_addr + i))}")
idaapi.patch_byte(dest_addr + j, idaapi.get_byte(data_addr + i))
i += 1
j += 1
low -= 1
if tByte & 8 != 0:
t = idaapi.get_byte(data_addr + i)
i += 1
t = idaapi.get_byte(dest_addr - t)
high_2 = high + 2
high_2 -= 1
while high_2 >= 0:
print(f"patch byte at {hex(dest_addr + j)} by {hex(data_addr + i)} : {hex(idaapi.get_byte(data_addr + i))}")
idaapi.patch_byte(dest_addr + j, idaapi.get_byte(data_addr + i))
i += 1
j += 1
high_2 -= 1
else:
high -= 1
while high >= 0:
print(f"patch byte at {hex(dest_addr + j)} by {hex(data_addr + i)} : {hex(idaapi.get_byte(data_addr + i))}")
idaapi.patch_byte(dest_addr + j, 0)
j += 1
high -= 1
|
执行一下,发现数据以及被初始化了,我们找到加密的地方,就能看到 enc 已经被写进去了

写个脚本解密一下
1
2
3
4
| enc = bytes.fromhex("66 6D 63 64 7F 57 37 4B 3C 7B 58 40 3A 70")
for i in range(14):
print(chr(enc[i] ^ i), end = '')
|
 wechat